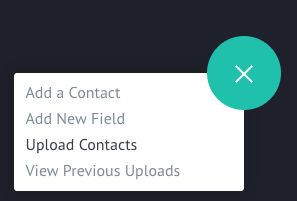
Uploading contacts is the most efficient way to add multiple contacts to the database. Within the platform, you can import a spreadsheet of all your contact data.
When saving your spreadsheet, please ensure the file type is .CSV (Comma Delimited). Please ensure the first row of your file contains your column headings as well.
To upload your data, navigate to the Contacts page, click on the + icon and select Upload Contacts.

Clicking on "View Previous Uploads" allows you to view all previous files that were imported. For each file, a detailed report is also viewable along with the ability to download a copy of the previously uploaded file as well as downloading a report on all the records that failed to upload.
Any ongoing uploads will also be displayed on this page along with their current upload status.
To begin the upload process, drag the CSV file onto the page or click within the white dotted box to select the file from your computer.
Matching Columns
The CSV file is not required to be in any specific format or layout. It is important to ensure that the first row of your file contains your column headings. During the upload process, the first row is automatically ignored.
Once the file has been uploaded, you will be presented with a screen requiring you to match each column of your csv file to the corresponding contact field setup in your account. Any columns in your csv file that you do not need imported, can be set to be ignored.
We'll automatically attempt to complete this step on your behalf by trying to understand the column names and relating them to the fields in your account. You can still re-organise the mapping if the system has guessed any incorrectly.
The "Belong To" dropdown will display all Contact Fields available in your account. You can create new fields on the fly by selecting "Create a new contact field" in the dropdown.
Once the field mapping has been completed, click Next.
Bulk Updating Records
For each row of your spreadsheet, you can also specify hardcoded values for different contact fields. As well, each uploaded record can also be provided with a Tag at this step.
Example: If the CSV file contains records of users that live within the city of "Melbourne" - you can bulk update the City field of each person to "Melbourne". As records are imported, we will automatically set the City of each user to Melbourne.
Tags are a handy way of keeping your data segmented.
Along with the Tag, you can also update the records of any Contact Fields that were not previously mapped.
Providing Consent and Executing Automated Workflows
Prior to processing your upload, please agree that the data was collected within the anti-spam and privacy regulations as set out by the platform and your local laws.
If you have any active automated campaigns, you can also elect to have this data be ignored and have no automated workflows execute against it.
Example: If you have an automated campaign that is sent to all new users, you may not want those added via this upload to receive that campaign.
We can also send you a confirmation email once the data has been fully imported. To do this, select or enter an email address into the field.
After confirmation, your upload will begin. At this stage, you can choose to navigate away or logout - the upload will continue processing in the background.